I trust you have thoroughly enjoyed my first introductory article on body butters and why to use them. As promised I bring you the second one which includes lots and lots of recipes.
One of the advantages of body butters is the relative ease with which you can formulate these rich moisturizers in your kitchen. The ingredients are readily available both online and offline and as long as you learn a few tricks, you will need no more than 20 to 30 minutes to whip up a batch of body butter that will deliver the precise results you want.
The best part is that when you are making body butters at home as opposed to buying a commercial formulation, you can tweak the recipe to meet the specific requirements of your skin. For example, most store bought products will hydrate and moisturize but with your homemade body butter, you can tackle cellulite, battle ungainly stretch marks and even stop skin wrinkling and sagging in their tracks.
In terms of the fragrance of your body butter, you get a wide variety of choices; from citrusy fresh to enthralling florals and earthy woody and spicy aromas. On the other hand, if you are somebody who cannot stand strong scents, it is always possible to leave the fragrant compounds out and still get all the therapeutic benefits of body butters. So, if you are vying to get your first batch of body butter going, here is all the information you will need along with detailed instructions and recipes.
The tools you need to make body butter are right there in your kitchen
1. A kitchen scale
Instead of melting the fluids before measuring them, an easier approach is to simply use a digital kitchen scale and measure everything in grams. This way the measurements are more precise and the resultant butter will have the exact texture that you are going for.
2. Small measuring cup (optional)
A plastic cup, the kind that is often supplied with oral suspensions for children, will work well to measure out liquids in quantities as low as 5-10 ml.
3. Dropper
This will be needed for adding essential oils to the butter
4. Mixing bowl
A glass bowl that can hold about 100 to 200 gm of lipids will do as long as you get enough space on top to use a blender and then mix in the other ingredients.
5. Double boiler
Excess heat adversely impacts the nutritional and lipid content of plants butters and oils. But, you will need to melt the butters and the waxes before they can be mixed with the oils and other ingredients and this is why you need a double boiler. Placing a glass container with the solids in it in a water bath is also an option, albeit it can be messy and slower and you will need to use a beaker or mug that will not crack when exposed to heat.
6. Spatula
A wooden spatula is highly recommended, but if you don’t have one, a glass stirrer will also do.
7. Hand blender
Although you could use a wire whisk, it won’t offer the smooth and consistent results that you can get by mixing the lipids with a handheld blender.
Step By Step Guide To Make Body Butter At Home
Making body butter at home quickly turns into a fulfilling endeavor the minute you see your skin reflecting the results of your efforts. The task is easy, yet for all its simplicity, there are a few basics that you need to get right if you want your body butter to have the desired texture and consistency and offer the expected results.
A crucial step in the body butter making process is that of choosing the right mix of plant butters, oils and waxes. You will remember from our last article on the topic that these three are the primary ingredients of body butters. Although you have a myriad of options available, you cannot simply pick random oils and butters and expect perfect results.
In fact, the ingredients have to be chosen in such a way as to bring out the best in each. The butters, waxes and oils have to complement each other, so that their skin healing and hydrating properties work synergistically and in your final product you get the sum of all their benefits. So, when picking the oils, waxes and butters, you need to consider three factors:
1. Viscosity of the oil
The thicker the oil, the greater will be the weather protection that your skin gets from it. But, this also means that it will leave your skin feeling oily and slick, and there is a good chance that your clothes will bear tell tale oil stains.
Also, denser oils offer superior moisturization, but owing to their large molecular size, they tend to stay on the surface of the skin. So, they are not good transporters of nutrients, particularly when you want skin nourishing vitamins and minerals to seep into the deeper dermal layers.
On the other hand, lighter oils are powerhouses of vitamins and other skin healing nutrients, but they offer little by ways of environmental protection. Also, because they quickly get soaked into the skin, they do not prevent the loss of moisture from the dermal cells as much as the heavier oils.
The optimal approach is to strike a balance between light and heavy oils. Combining different types of lipids will give your skin protection against cold weather and wind and the nutrients it needs to stay healthy, soft and glowing. With this result in mind, here is a look at the viscosity level of the oils discussed in the last article and a few other popular options.
Very thick oils:
- Argan
- Avocado
- Wheatgerm
- Castor
- Aloe vera
- Tamanu
Medium thick oils
- Olive
- Almond
- Rice bran
- Sunflower
- Sesame seed
- Apricot kernel
- Safflower
- Calendula infused (depending on base vegetable oil used)
- Carrot infused (depending on base vegetable oil used)
Light oils:
- Coconut
- Evening primrose
- Hempseed
- Raspberry seed
- Sea buckthorn berry
- Walnut
- Flaxseed
- Grape seed
- Rosehip seed
- Macadamia
2. Texture of the butter
Plant butters can be segregated on the basis of not only their melting points but also their texture. You can find butters that range from very hard to very soft and everything in between. In terms of skin benefits, hard butters offer less emollient value but they make up for this by bringing anti-ageing effects and a lot of nutritional takeaway to the table.
Similarly, soft butters coat the skin very well, but they seldom have the antioxidant and nutrient profile of astringent butters. Moreover, the inclusion of hard butters in the recipe adds texture to the formulation and helps to emulsify the butter if you have used water based humectants like honey or glycerin.
In fact, as long as the quantity of the hydrophilic ingredients does not exceed 5-10%, just using a hard butter will get the job done and you won’t have to bother with a separate emulsifying agent. That said, here is a look at how the different plant butters discussed in our last article and a few other popular options fare on the hardness scale:
Hard:
Has the consistency of butter kept in the freezer, but does melt when rubbed in between the palms for a few minutes.
- Cocoa
- Kokum
- Illipe
- Chaulmoogra
- Maria/White Cocoa
- Sal
- Murumuru
Medium hard:
Has the hardness of butter that has been removed from the refrigerator and has been kept out for a couple of minutes. These plant butters melt when rubbed on the skin.
- Mango
- Cupuacu
- Dhupu
Soft:
Feels like butter kept at room temperature and can be applied directly on the skin. These butters have a consistency that is very close to that of cold cream.
- Shea
- Kukui nut
- Mowrah
Very soft:
Has the consistency of butter kept out in hot weather or exposed to some heat and is about to melt. These plant butters will turn to oil almost immediately on contact with skin.
- Coconut cream/virgin coconut oil
- Aloe butter
- Avocado butter
- Palm kernel butter
Nutritional profile:
Finally, you want your body butter to have well rounded nutritional properties. This means that along with essential fatty acids, the ingredients should also add vitamins, mineral, phytoesterols and antioxidants to the preparation. So along with the plant lipids, you will also have to include a range of secondary ingredients. But, these should not compromise the protective capacity of the formulation.
In a nutshell, you are trying to get the best hydration and moisturization along with loads of vitamins and minerals and a host of antioxidants that will protect the skin from damage due to free radicals, keep the skin cells healthy and prevent skin ageing. But, for this you need to ensure that the ingredients are blended together in the correct ratio.
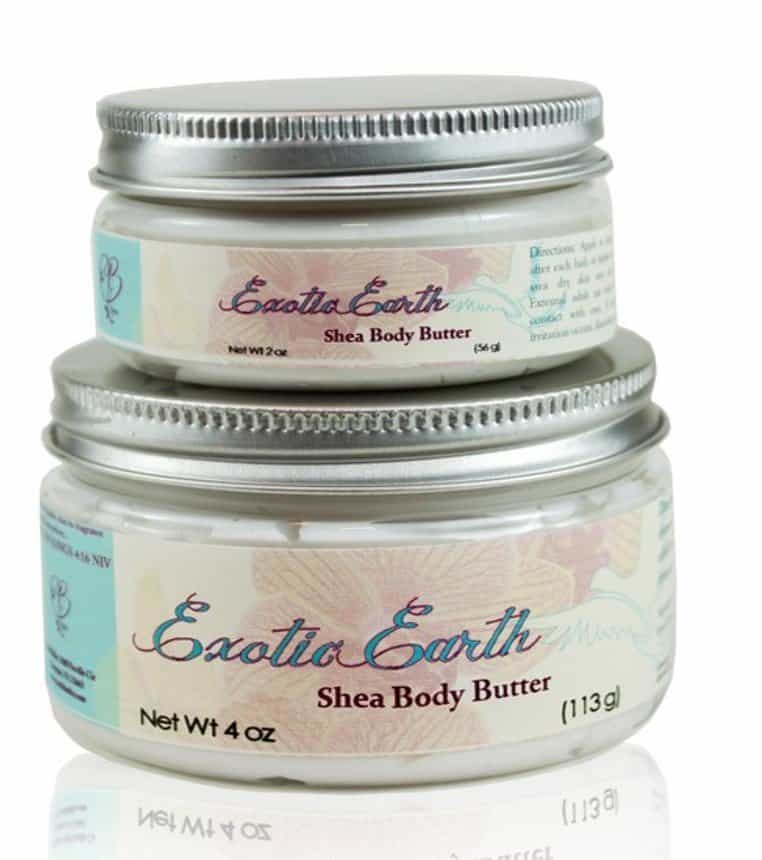
If you don’t want to make body butter at home, you can click on the image below to buy one.
Getting The Ratio Of Solids To Liquids Right
Mixing the oils and butters
The thicker and denser the oil, the more astringent will have to be the butter that it is combined with it, unless you are making body butter meant to shield your skin from exceptionally cold weather. For example, if you are using argan oil, which is one of the most viscous skin care oils, it would be better to combine it with a hard and astringent butter like that of kokum than to mix it with shea butter, which is just as dense and oily.
Similarly, when using a light oil like that of hempseed or evening primrose, you will need a rich, medium hard butter like that of mango and a very soft butter like that of coconut. If you are mixing a light oil with a soft butter, you will need a wax to add body and texture to the formulation. For example, if you are blending hempseed oil with palm kernel butter, including a hard wax in the mixture will give your skin greater protection and better texture to the formulation.
The precise ratios:
Ideally, you want to keep the ratio of liquids to solids at 1:1, unless you are using a hard butter in which case, you should bring down the quantity of butter to 1/3 otherwise the inclusion of the oil will only make a marginal difference to the hardness of the butter and the resultant formulation will still feel stiff. If you are using a light oil, you should combine 40% oil with 40% soft butter and 20% hard butter.
Using the waxes:
For a super light and non greasy butter, you will need to increase the quantity of the non-oily liquids in the formulation. To create an emulsion, you will have to include a plant wax. Also, if you want to combine a very soft butter with an oil (very viscous or light), you will have to include wax in the preparation to get the buttery texture.
When working with a wax (beeswax or plant wax) keep the quantity down to between 1 tsp to 1 tbsp. The more wax you add the stickier and harder the butter will be. If you do not like the sticky feel created by Beeswax or plant waxes in general, combine them with a hard plant butter. This way you can tone down the quantity of wax needed.
Blending The Solids And The Liquids
The solids, both the waxes and the butters have to be melted before they can be mixed together with the oils. However, you cannot just place them on the stove directly. While microwaving is an option, the less heat these lipids are exposed to, the better it is for their nutritional content. So, using a double boiler is the best and most convenient approach.
If you don’t have a double boiler, place the solids in a glass beaker or cup and place the beaker in a bowl of boiling hot water. The heat will be enough to melt the solids but it will take longer than if you were to use a double boiler. Although a lot of people recommend that you just heat the butters and waxes alone, I personally like to mix the butters and the waxes with the oils and then heat the mixture. This makes it easier to blend the lipids together later. Also, mixing cold oils in the hot, melted butters often leads to a grainy texture as the lipids in the butters cool down and often crystallize.
Do not forget to cut the hard butters into small pieces or thin slices before adding them to the oil. This way they melt faster and require less heat. Continue stirring as you heat the solids and the oils. Once all the butter and waxes have melted, you are ready to take the mixture off the heat.
Stir with a spoon till the mixture is at room temperature. At this point, the mixture will start to get cloudy. Place it in the refrigerator for about 10-15 minutes and remove and use your hand held mixer on it. As you whisk, the cloudy mixture of plant butters, waxes and oils will start to take on a frothy, creamy look.
Continue whisking for about 5-10 minutes. The heat generated by the machine may melt the butters again, but don’t worry too much about this. Place the mixture in the refrigerator again for about 15 minutes, remove and give it another round of whisking. This time, you will see your ingredients coming together to form a light, airy textured cream. You may need Round 3, depending on the oils and the butters used. Your body butter is now ready for the addition of the delicate aromatic compounds like essential oils.
How To Make Body Butter With Shea Butter?
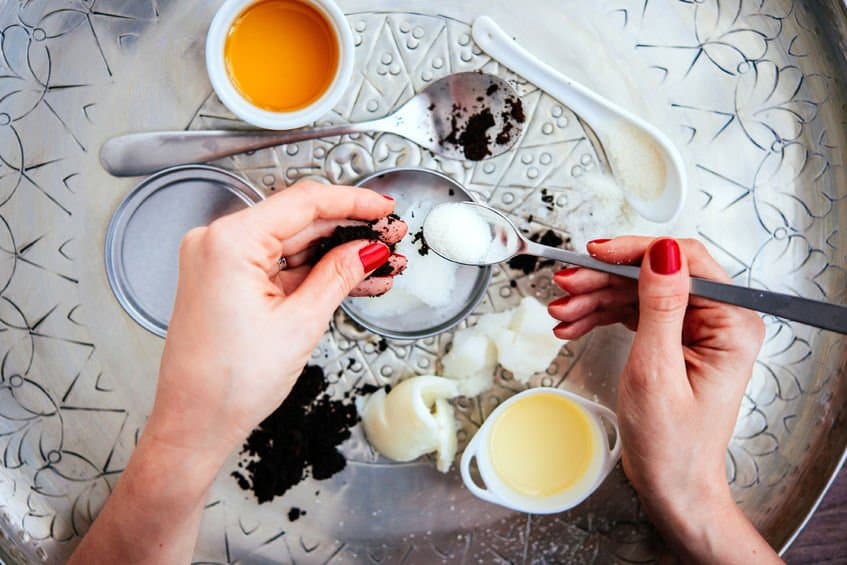
Shea butter is a soft and rich butter that is perfect for winter months. It is a fantastic emollient that spreads smoothly and offers a high degree of protection and skin coverage. But to counter the softness and oiliness, you need to couple it with a hard butter or a combination of a wax and a medium hard butter. As far as the oil is concerned, it would be best to go for an astringent oil, unless you are dealing with winter temperatures that plunge below 5 to 7 degrees Celsius.
Here is an easy recipe that is specifically meant for fall and winter skin care:
Ingredients
- 20 gm shea butter
- 15 drops argan oil
- 15 drops evening primrose oil
- 30 gm mango butter
- 10 drops jojoba oil
- 5 ml castor oil
- 2 ml algae extract
- 1/4 tsp turmeric
- 1 tsp of rose petal powder
- 20 drops lavender oil
- 5 drops rosemary oil
- 1 tsp vitamin E
Preparation
Measure the butters and add the shea butter to the container that you intend to heat the lipids in. Chop the mango butter into small pieces and add to the shea butter along with argan, jojoba, evening primrose and castor oils. Melt the butters according to the instructions given in the section above. Continue to stir as you heat the oils and butters and take off from the heat once you have a homogenous mixture.
Stir till a bit cloudy and then place in the refrigerator for about 10 minutes. Take out and add the powder and algae extract mixture to the lipids along with the vitamin E. Whisk the mixture with your hand held blender till all the ingredients come together to form a smooth paste. After about 5 minutes of whisking, the mixture will take on a lotion-like look. This is the time to put it back in the refrigerator for about 10 minutes.
Take it out and put it through another round of whisking, this time continue to whisk till the mixture solidifies and takes on a creamy, buttery consistency. Finally, add the lavender and rosemary essential oils and mix with a wooden spoon or a glass stirrer. Mix well so that the essential oils become one with the other lipids.
Transfer the soft butter into a weck jar or any mason or glass jar used for canning. Place in the refrigerator for a few hours and your butter will be ready for use. If you like the feel of cool butter on your skin, you can continue to store it in the refrigerator or it will stay just as well on the bedside table. Just remember to not place it in the bathroom where the lipids will be exposed to direct steam and heat.
How To make Body Butter With Coconut Oil?
The wonderfully light coconut oil is a potent source of protein and medium chain fatty, which give it skin rejuvenating and regenerating properties. Apart from being an intense moisturizer, coconut oil is also a strong antimicrobial agent that is known to be effective against skin sagging and stretch marks.
So, here is a summer body butter recipe that is light yet hydrating. You will need:
Ingredients
- 20 gm coconut oil (virgin is preferred over fractionated)
- 10 gm illipe /sal butter
- 10 drops jojoba oil
- 10 drops sea buckthorn berry oil
- 5 ml vegetable glycerin
- 1 tsp matcha/2 ml green tea extract
- 1 tsp apple powder (also known as apple extract)
- 5 drops rosemary oil
- 1 tsp vitamin E
- 10 drops rose essential oil
Preparation
Mix the powders and the glycerin together and set it aside. Melt the butters and the oils and continue mixing even after melted till the lipids are at room temperature and turn cloudy. Then, add the powders to the oils and whisk well. Also add the vitamin E and rosemary oil and refrigerate for about 15 minutes. Remove and whisk with a hand held blender till you get the consistency of skin lotion. Refrigerate once again for 15 minutes, remove and whisk. Add rose essential oil to the mixture, which should now have the consistency of hard, churned butter. Mix well and store in a dark colored mason jar.
How To Make Non-Greasy Body Butter?
The trick to making non-greasy body butter is to start with light oils, add hard butters to it and increase the quantity of water based ingredients from 5-10% to about 20-30%. However, increasing the amount of water in the mixture means that you will need an emulsifying agent, so be ready to use plant wax.
Check out this recipe that can be used to make body butter for those sweltering months:
Ingredients
- 10 drops each of evening primrose, sea buckthorn berry, raspberry seed, grape seed and rosehip seed oils
- 10 gm kokum butter
- 10 gm tuberose wax
- 1 heaped tsp kaolin clay/baking powder
- 2 ml vegetable glycerin
- 15-20 ml rose/helichrysum hydrosol
- 1 ml grapefruit seed extract
- 1 tsp vitamin E
- 5 drops rosemary oil
- 10 drops neroli essential oil
Preparation
Mix the glycerin and hydrosol with the powder (baking powder or kaolin clay) to form a slurry. You may need more hydrosol depending on the amount of powder used. Add grapefruit seed extract to the slurry and set it aside. Measure, mix and melt the oils, butter and wax, stirring as you go along. Remove the lipids mixture from heat and let it cool. Once it is at room temperature, add vitamin E and rosemary oil to it and start whisking with your hand held blender.
Add the slurry, one tsp at a time as you continue to whisk. It will take about 7-10 minutes of whisking to get a homogenous emulsion. Refrigerate for 15 minutes, remove and whisk again. Repeat this process a third time before adding neroli essential oil to the butter and folding it in gently. The final result will be a light emulsion with the texture of melted butter that spreads easily on the skin and does not leave an oily residue. This butter is best stored under refrigeration.
How To Make Body Butter With Honey?
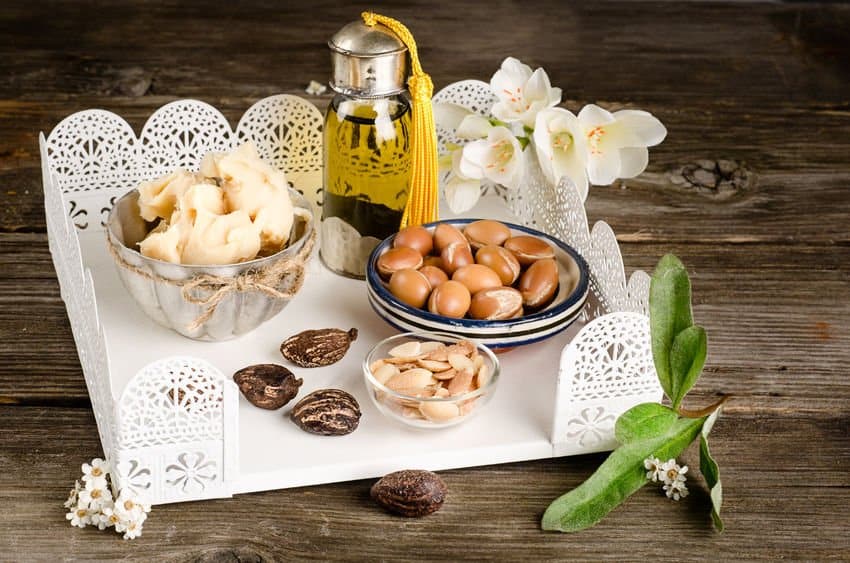
Honey is not only a natural antiseptic agent but also a potent humectant with skin clarifying properties. However, most people shy away from using the gooey ingredient in their skin care preparations owing to the stickiness it brings along. So, here is a recipe for making a light body butter with honey that offers all of its benefits without the stickiness. You will need:
Ingredients
- 10 ml honey
- 25-30 ml rose water
- 2 tsp kaolin clay
- 1 tsp pineapple powder/fruit extract
- 20 gm coconut oil
- 10 gm candelilla wax
- 20 ml hempseed oil
- 20 ml calendula infused oil
- 15 drops sandalwood essential oil
- 5 drops rosemary essential oil
- 1 tsp vitamin E
Preparation
As with the other recipe, mix the powders with the rosewater and honey to form a slurry mixture. Put all the lipids together and melt. Cool the oil and wax mixture till it gets hazy and then start whisking with the mechanical blender. Add the honey and powder slurry to the mix one teaspoon at a time till you have worked it all in.
Blend at high speed for a 2-3 minutes and place the mixture in the refrigerator for 15-20 minutes. Remove and blend again for about 5-10 minutes; repeat the process a third time before adding the essential oils to the mixture. Give it one last whisk before bottling the butter.
How To Make Body Butter With Beeswax?
This is one of the easiest recipes for an all-purpose body butter that can be used to make a rich and highly moisturizing formulation. To make this body butter, you will need:
Ingredients
- 10 gm beeswax
- 15 ml each, of carrot infused and apricot kernel oils
- 10 ml each of rice bran, walnut and pumpkin seed oils
- 10 gm capuacu / murumuru butter
- 15 drops jasmine essential oil
- 1 tsp vitamin E
Preparation
Mix the beeswax pastilles with the butter and the oils and heat till all the solids have melted. Cool to room temperature and blend till the mixture starts to solidify. Scrape the lipids from the sides of the bowl and place the container in the refrigerator for 15 minutes. Remove and re-whisk. This time, you should get a fairly solid and buttery cream after about 5-7 minutes of blending. Add the vitamin E and jasmine oil to the mixture and blend for another minute. Remove and store in any glass or plastic jar.
How To Make Body Butter With Cocoa Butter?
Cocoa butter is an extremely rich emollient that shields the skin from moisture loss as well as offers antioxidant protection. However, since it is a hard butter, you will need to blend it with other ingredients to make a body butter that goes on easy and offers all the skin benefits that you need. For this simple recipe, you will require:
Ingredients
- 2 tbsp aloe vera gel
- 1 tsp coffee powder
- 1 ml grapefruit seed extract
- 1 ml green tea extract
- 20 drops almond oil
- 10 drops argan oil
- 10 ml avocado oil
- 10 ml flaxseed oil
- 20 gm organic Cocoa butter
- 10 gm kokum / sal butter
Preparation
Mix the coffee powder with the aloe vera gel (use organic) and add the extracts to this mixture. Set it aside and get the lipids ready as you did for the other recipes. Once the oils and butters have melted, cool them to room temperature before you start whisking them with your hand blender. Add the aloe gel and coffee powder slurry to the lipids slowly as you work the mixture with the blender.
Once you have emptied the gel mixture into the lipids, whisk at high speed for about 5 minutes. Store the mixture under refrigeration for 15 minutes before removing and whisking again for another 5-7 minutes. Repeat one more time and store the butter in a glass container. This amazing body butter not only smells of delicious chocolate and coffee but also has a gorgeous milk coffee color and it offers all the antioxidant and skin tightening properties of both coffee and green tea.
If you have been able to keep up with my recipes, well done. I will have another set of recipes in my next article: whipped body butters. As always, please send me your comments and feedback.

