We live in a world that has developed at a breakneck speed over the last few decades. We harvest power from a wide variety of sources to keep our civilization humming and the lights burning. But this has not diminished the love we have for the humble candle. You will find it everywhere; in homes, churches, restaurants and so on. Its flickering flame not only acts a source of light, it also sets the mood and atmosphere of a place.
At a romantic dinner, it stands for passion and gentle love. In a cathedral, it is the ultimate representation of light from a higher power and the congregants’ reverence to it. In a funeral, candle light is used to pay homage to the departed and show solidarity with the bereaved.
In the post below, I provide a step-by-step process on how you can make your own scented candles using essential oils. So as you enjoy the beautiful flame of a candle, you can take in the heavenly scent too. But first, a short primer on the history of candles and candle making.
A Brief History Of Candles
The origin of candles cannot be accurately traced to a specific region of the world. Different civilizations developed them independently starting around 5,000 years ago. But what is most captivating is the methods and materials used by different groups of people to make candles. This is where things get interesting and sometimes a bit weird.
- The Egyptians are noted as one of the earliest peoples to develop a candle made from beeswax. Coincidentally, they are also credited with one of the earliest candle holders made from clay.
- Romans are thought to have started candle making as early as 500BC. Their candles were made from tallow, a form of fat derived from animal meat.
- In the 1990s, researchers discovered candles made from whale fat in the mausoleum of Qin Shi Huang, the first emperor of the Qin Dynasty.
- Other Chinese candles used wax from insects and seeds, which was then rolled in paper and burned. The Japanese derived their candle wax from tree nuts.
- In India, they got their wax from boiling cinnamon. The wax was then used in lighting temple candles.
- In parts of Europe, Africa and Middle East, candles came late because olive oil was widely available for use in lamps. When candles arrived in Europe, commonly used materials included tallow and beeswax.
- Around the 18th century, oil from a sperm whale was a very common candle-making material. Later on, two plant-based oils – Colza oil and rapeseed oil – were discovered and became popular for their smokeless flame.
- During industrialization, candles were mass produced and consisted of paraffin oil and braided cotton wicks.
As better forms of lighting were discovered, candles declined in popularity. They also moved from using paraffin oil to other types of waxes including flax-seed oil, palm oil and soy oil. These waxes were often mixed with paraffin oil for burning efficiency and other substances to produce a variety of fragrances.

Make Your Own Scented Candles Using Essential Oils: A Step By Step Guide

Making candles has become such an easy and straightforward process that you can do it at your own home. Instead of spending a lot of money on store-bought candles, consider starting a small DIY operation in your kitchen. Don’t worry, it is quite safe and does not require any expensive or complicated equipment.
One advantage of making your own candles is that you can customize them as you see fit in terms of colors and scent. Whether you want a red lavender-scented candle or a christmasy pumpkin-scented one, I have the tutorial just for you. I have broken it down into an easy step by step process with everything you will need included.
Ready? Let’s go.
Things You Will Need – Ingredients:
- Candle wick and metal collars
- Glass containers for the candles
- Wax flakes
- Essential oils
- Non-toxic wax crayons
- Heat resistant glass jar
- Pot or saucepan
- Wooden spoon
- Thermometer
- Chopsticks or toothpicks
- Old newspapers
Skill Level And Time Needed:
Anyone, even a complete beginner can do this. As I mentioned, you do not need any fancy or expensive equipment. The technique itself is also very simple. All you need to do is buy the right materials and properly follow the instructions below.
As for the amount of time you will need, consider setting aside an entire morning or afternoon when you are sure there will be no disruptions from anyone. If you want to buy the materials and make the candles on the same day, then set aside an entire day.
Directions:
Step 1 – Clear the counter
The best place to make the candles is the kitchen especially since you’ll need to use the oven and stove. Clear a large enough space on the counter. Getting rid of clutter is important for safety and will help you focus on the task at hand. Because you will be dealing with hot wax, it is not a good idea to have kids around. Find an afternoon when they are at school or away somewhere else.
Step 2 – Warm up the candle jars
The number of candles you want to make determines the number of glass containers you need to get. There are plenty of stores where you can buy candle glass jars in different shapes and sizes. An example of a glass votive candle holder is here. Check online or a local store near you.
The jars need to be completely dry and slightly warmer than room temperature before you pour hot wax in them. To achieve this, put them on a baking tray and place them in the oven. Set the oven on low heat and leave the jars to warm up for several minutes. In the meantime, you can go back to preparing other materials.
Step 3 – Put together the wicks
One of the most important components of a candle is the wick. This is the part that burns, fueled by the candle wax. The wick will go to the center of your candle. You have two options here; either buy pre-made wicks that are already fitted into metal collars or buy an uncut roll of wick and metal collars separately. The second option allows you to make candles of whichever length you prefer because you are doing the cutting yourself. Also note that you’ll need a pair of scissors if you take this path. After cutting, you’ll need to fix them onto the collars.
When buying the wick, be careful about the type and size. There are two important factors that should influence the type of wick you buy: the kind of wax you are using and the intended candle diameter. Some of the wick types you will come across include zinc core (ideal for votive, pillar and gel candles), paper core wicks (ideal for large candles) and Eco wicks that are perfect for natural wax candles such as soy. As for the size, the wider your candle diameter the larger the wick should be.
Under wicking (wick too small) results in a tiny dim flame that creates a sunken pit in the middle. Over wicking (wick too big) causes an oversize flame that flickers and causes the wax to burn too quickly and messily.
When buying wicks, always check the size details and make sure they are the right ones for your candles. If you are not sure of the best size, you may have to test with several wicks until you find the right one. I have found one with 3 different wick diameters.
Step 4 – Position the wicks
Take the jars out of the oven (be careful, they might be hot) and place them on the counter. Take the wicks and place them in the jars with the metal pieces at the bottom. You might have to melt a bit of wax and place it at the bottom first and then secure the metal collar on the wax. Now, you need to make sure the wick stays upright. Here is where a couple of toothpicks or chopsticks will come in handy. Place them across the top of the jar with the wick caught upright between them.
Step 5 – Measure the wax flakes
When it comes to measuring the wax flakes, there is one general rule: add twice as much as the size of the candle jar. If you have a 3oz votive jar, add 6oz of wax flakes. You’ll need a measuring cup or jar to put in the right amount of wax. A good idea is to use a Pyrex measuring cup in which you will also melt the wax.
As with the wicks, there are many different types of wax flakes you can buy Paraffin wax. There are different varieties of paraffin wax depending on the type of candle you are making. If you prefer a natural eco-friendly option, try soy wax, palm wax or beeswax.
Step 6 – Melt the wax
Before you can make your candle, you need to melt the wax. This will require you to use a double boiler. Place a saucepan or pot over the stove and position the jar with the wax flakes inside. Add water to the pot but be careful not to fill it up too high to prevent the boiling water from splashing inside the jar.
Set the stove to medium heat and allow the water to come to a boil. As the wax begins to melt, use the wooden spoon to stir it gently. This ensures that all flakes are melted and no airspaces are left inside the wax.
Use a thermometer to check that the wax remains between 150 and 180 degree Fahrenheit (65 to 82 degree Celsius). Be very careful at this point as the wax can cause burns.
Step 7 – Customize your candle: color and scent
Use the crayon pieces to give your candles some color. Break off small pieces and add them one at a time to the wax, stirring it slowly for even distribution. To test the color, pour a few drops of wax onto a piece of paper and wait for it to solidify. Add more pieces until you get the level of saturation you desire.
Once the wax has melted fully and you have added the color, take it out of the hot water and set it aside to let it cool. Do not add any fragrance until the temperature has dropped to around 125 degree Fahrenheit (52 degree Celsius). This prevents the oils from evaporating away.
For the fragrance, essential oils are your best friends. You have an almost endless variety of choices to choose from depending on the mood you want to create, your preferences and season of the year (e.g. christmas, winter, thanksgiving, etc.) Some popular choices include bergamot, cedarwood, cinnamon, cypress, eucalyptus, geranium, grapefruit, lavender, lemon, lemongrass, patchouli, mandarin, mint, orange, rose, rosemary, sandalwood and ylang, ylang.
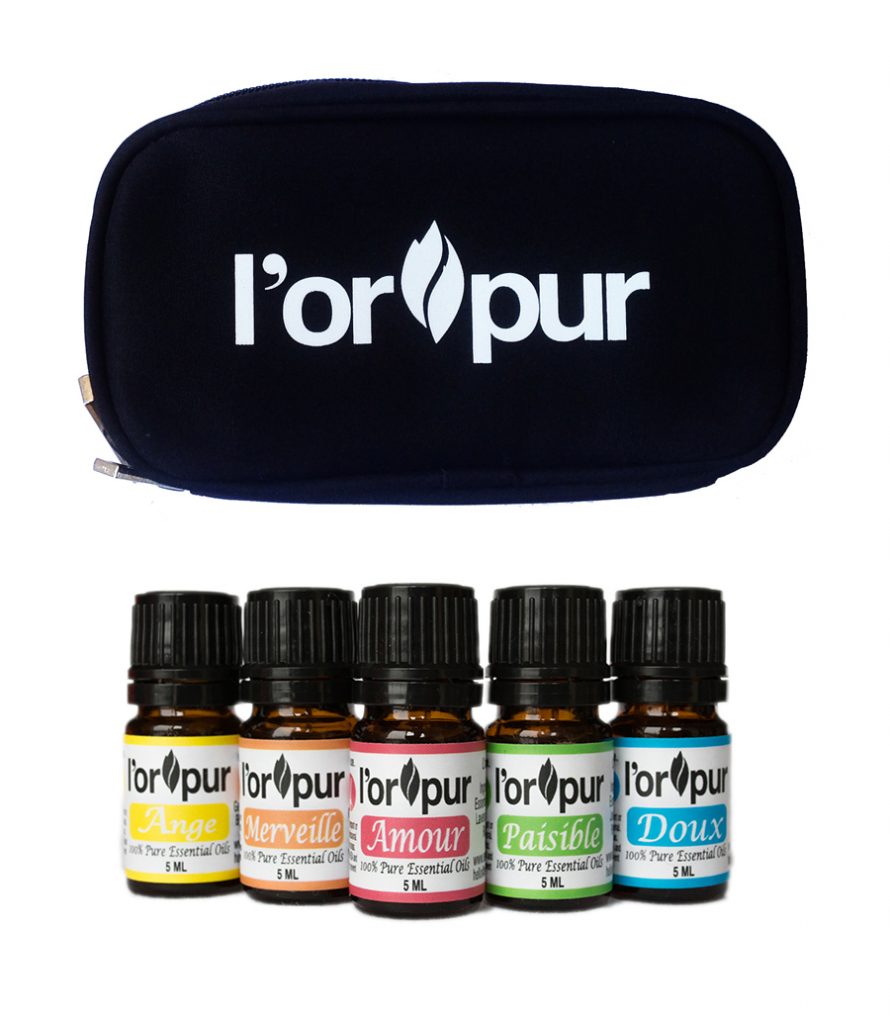
You can find all the above essential oils in my pure 100% essential oils kit. And the best part is that you won’t need to purchase 20+ single essential oils as they are already pre-blended in 5 different scents/fragrances.
 Click Her To Read About My 100% Pure Essential Oil Blends Kit
A general recommendation is to add 10-15 drops of essential oils to 16oz of melted wax. Ultimately, your sense of smell is the best judge of the right amount of essential oil to add. Some oils such as eucalyptus tend to be more concentrated meaning you’ll need fewer drops of them. For a unique fragrance, experiment with different combinations of essential oils and see what you come up with.
Step 8 – Pour the wax into the candle jars
Place old sheets of old newspapers under the jars to protect your counter and check to make sure that the wick is still held upright. Slowly pour the melted and scented wax into the candle jars. Do not fill the jars completely to the top to ensure that the wax does not flow outside when the candle starts burning. Also make sure the wax attains an even surface by giving the jar a slight shake to fill up any remaining pockets.
Step 9 – Let it set
The next step is to check that the wick above the wax is the correct height. If it is too long it will fall to the side and cause a mess when burning. If it is too small, it will be difficult to light it. Leave around a quarter of an inch standing above the wax surface.
Once you trim the wick, all that is remaining is to leave the wax to completely solidify. It is best if you let it solidify at room temperature, which should take around 3 to 4 hours. This allows it to harden naturally without any cracks or air pockets.
Light It Up
Once the wax has satisfactorily hardened, light it up and see how it burns. If the hardened wax has any sunken places, you can add more wax before lighting it. If you enjoyed the process, experiment some more with other scents, colors and waxes. You can make candles to help you relax (and sleep), for specific celebrations or simply for their decorative effect.
Enjoy!
PS: Hit me with an email if you would like more DIY articles with essential oils!


