It is easy to assume that a diffuser needs no cleaning; after all, the only thing that goes into the machine is a few drops of essential oil or a mixture of water and essential oils, depending on the type of diffuser used.
And, aren’t essential oils the most powerful antimicrobial agents in nature? So, if you were to go by that explanation, of course, there can be no such thing as a dirty diffuser.
Wrong!
Think of it this way; your freezer is at subzero temperatures which is enough to ward off most critters, yet you have to clean it from time to time. Ditto for your gas, which burns hot enough to kill most germs, yet you have to give it a round of scrubbing after use.
This naturally raises the question, but the stove top and the freezer both see a lot of action while a diffuser gets used for a few minutes each day, and you only put oils and possibly some water in it, so…
Why Clean Your Diffuser?
For starters, what comes out of the refrigerator and what gets cooked on the stove, goes into your tummy. So, if it’s just a wee bit contaminated, the acids in your stomach are strong enough to deal with the lapse.
In contrast, the output of the diffuser is inhaled and since your lungs don’t have a defense mechanism in place, the contaminants accumulate in the air sacs and make their way into your blood stream. This explains why you need to play it safer with the diffuser.
Yes, those essential oils have killer antimicrobial properties. But here are four factors that you need to consider:
- Depending on the type of diffuser, you have possibly used water in the machine, and when allowed to stagnate, it turns into the perfect breeding ground for fungus and bacteria.Because you will leave the water in the diffuser after using the machine for a while, chances are that most of the antimicrobial components of the oils may have already evaporated. So, you and the diffuser are basically on your own in your fight against the colonizing critters.
- Regardless of the diffusion method used, the lighter molecules are always the first to disperse. Some are so heavy that they stay put even after heating. Now, these heavy compounds tend to be both oily and sticky, which means they are dirt magnets. So, leave them in the diffuser and soon enough you will be dealing with an accumulation of allergens waiting to be dispersed into the air that you so eagerly want to inhale.
- The mixture of water, essential oil remnants and dust corrodes the diffuser and clogs the machinery, increasing the risk of malfunction. So, a cleaning is also crucial for maintaining your diffuser in top condition. Hence, most manufacturers recommend both daily and monthly/bimonthly cleaning sessions.
- The heavy molecules that stay behind will mix with the oils that you use in your next aromatherapy session. So, a dirty diffuser will understandably smell off even if the oils used in it are still in their prime.
Moreover, given the chemical changes that the residue is bound to undergo and its reaction with the compounds in the new blend of essential oils, you never know if you are going from helpful to harmful. Let us not forget – the very oils that are known to offer so many therapeutic benefits become harmful once oxidized.
Plus, a mingling of the properties may not always work out for the best. For instance, the residue of an energizing blend may interfere with the calming properties of a stress relief blend used later in the day or even the next day.
For more on essential oil diffuser blends, click here.
When To Clean Your Diffuser?
Opinions vary widely on this one, not just among aromatherapy enthusiasts but also among manufacturers. While some companies recommend that you clean the diffuser after each use, others offer more leeway by suggesting that a quick clean after 2-3 uses should do.
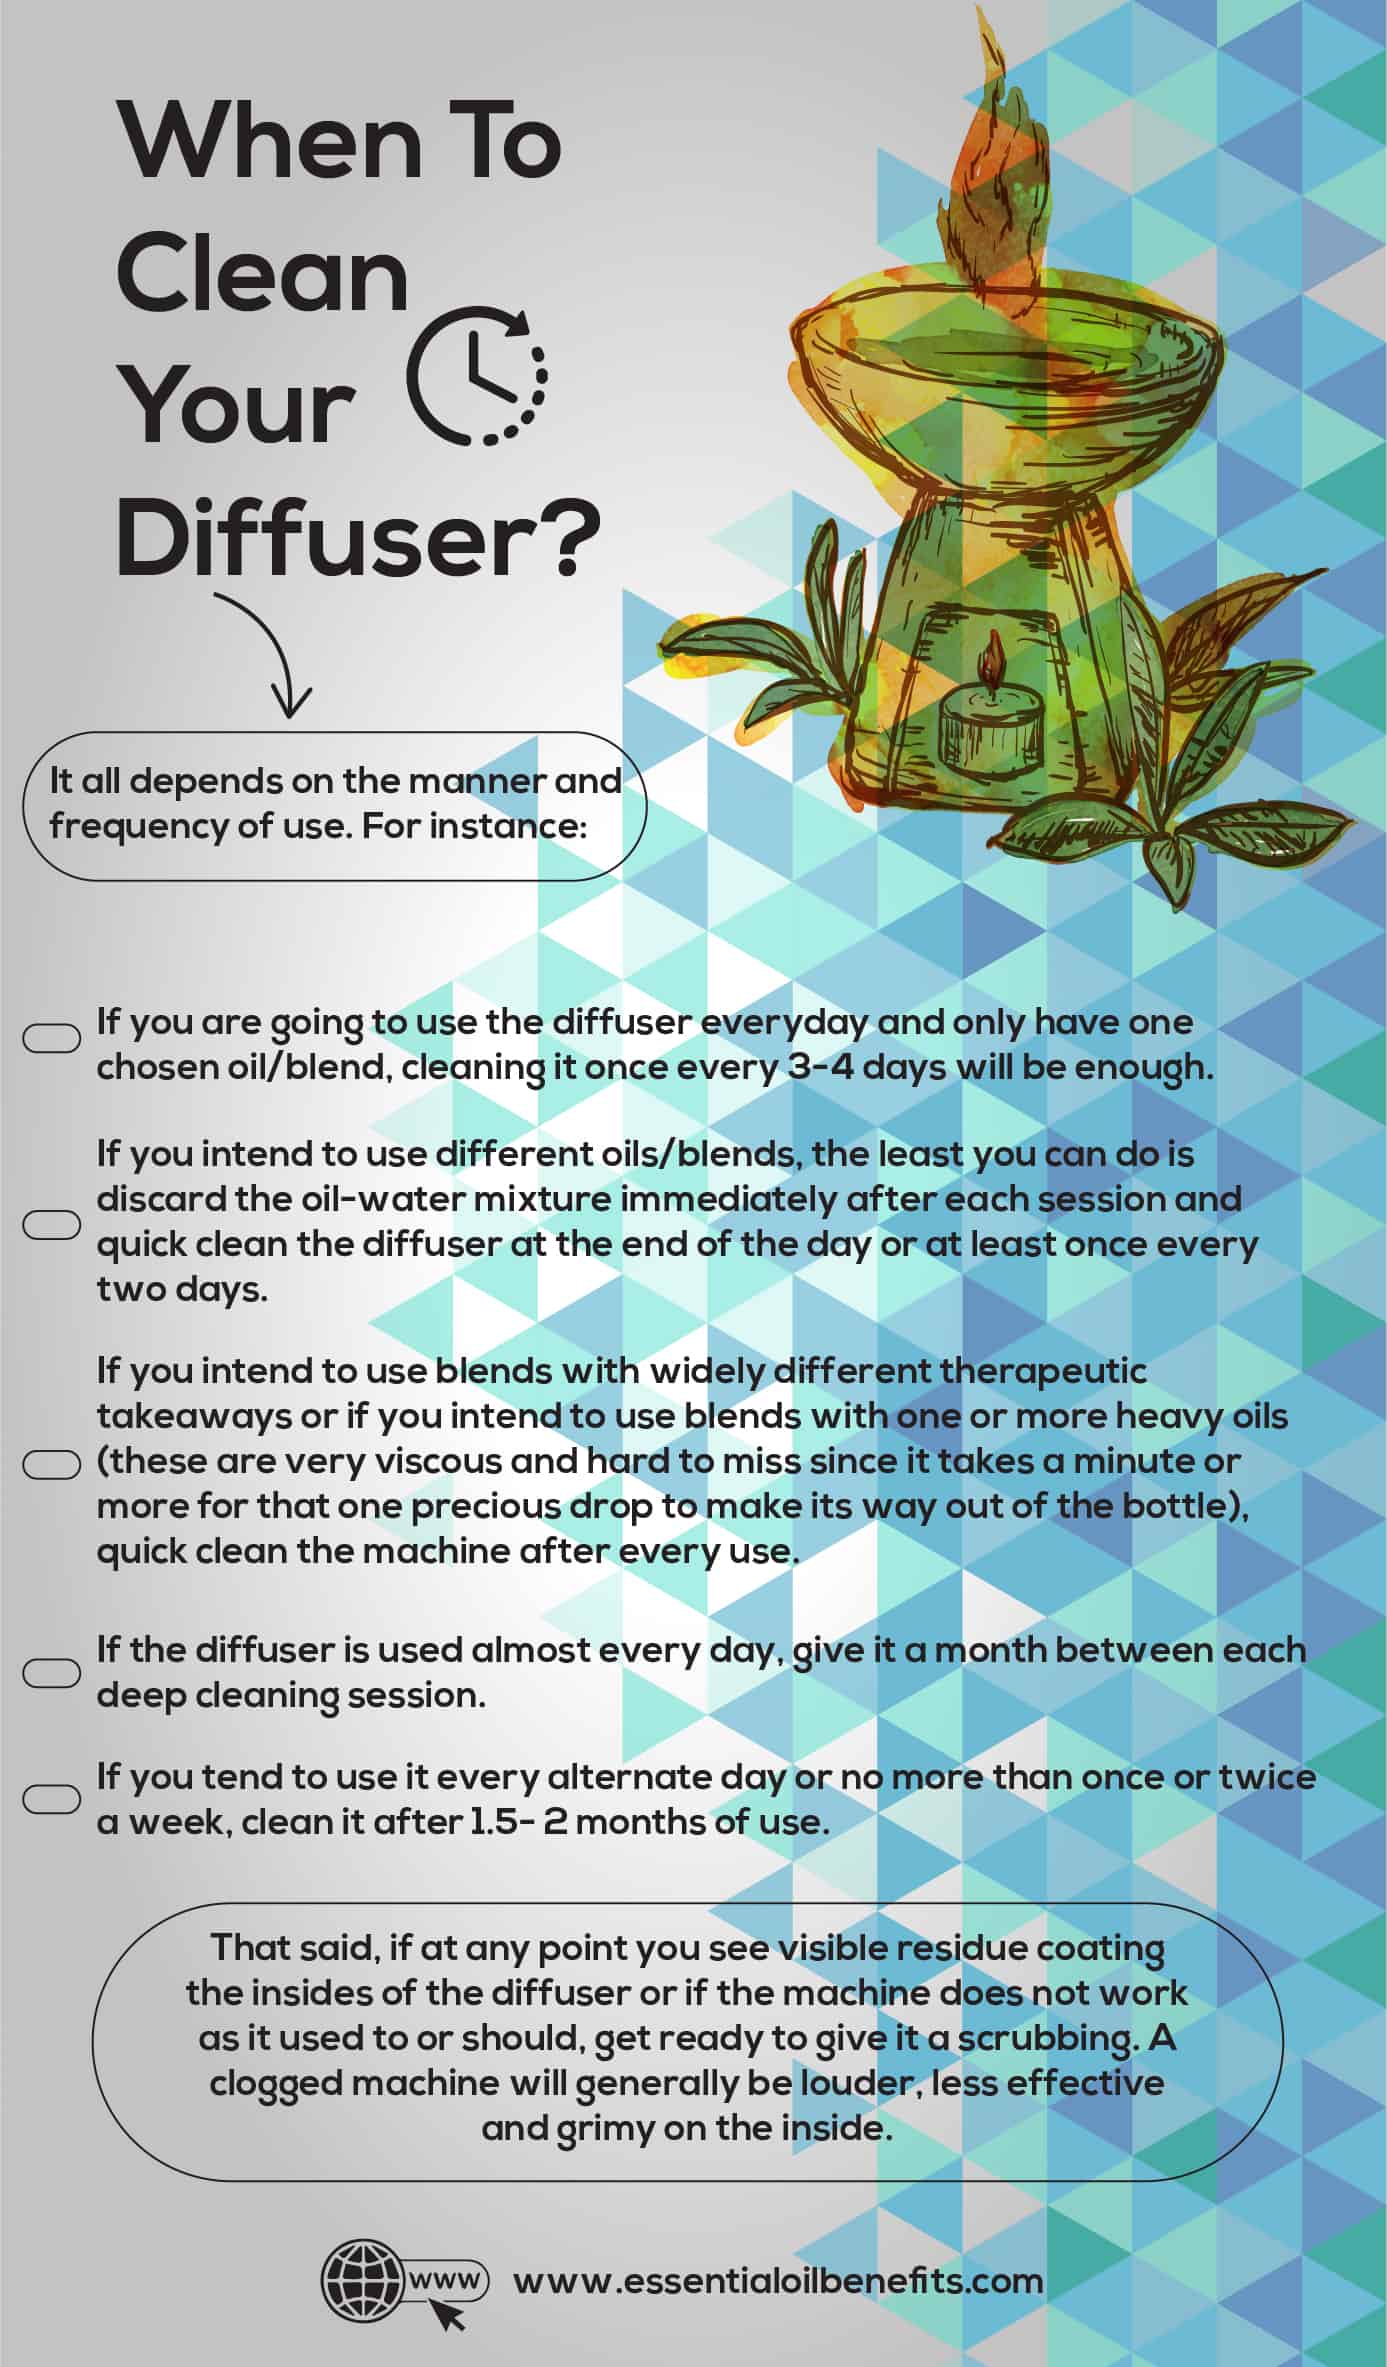
But, everybody agrees that the machine should be cleaned every 1-2 months and this should be a full blown/complete cleaning session. In my opinion, it all depends on the manner and frequency of use. For instance:
- If you are going to use the diffuser everyday and only have one chosen oil/blend, cleaning it once every 3-4 days will be enough.
- If you intend to use different oils/blends, the least you can do is discard the oil-water mixture immediately after each session and quick clean the diffuser at the end of the day or at least once every two days.
- If you intend to use blends with widely different therapeutic takeaways or if you intend to use blends with one or more heavy oils (these are very viscous and hard to miss since it takes a minute or more for that one precious drop to make its way out of the bottle), quick clean the machine after every use.
- If the diffuser is used almost every day, give it a month between each deep cleaning session.
- If you tend to use it every alternate day or no more than once or twice a week, clean it after 1.5- 2 months of use.
That said, if at any point you see visible residue coating the insides of the diffuser or if the machine does not work as it used to or should, get ready to give it a scrubbing. A clogged machine will generally be louder, less effective and grimy on the inside.
Step By Step Guide For a Clean Diffuser
I am going from least to the most here in terms of effort required for cleaning, and this is for ultrasonic diffusers (non-wick), regardless of the make and model.
Quickest clean
The least you can do for the machine that offers you so much is get rid of the stale stuff in it. If you intend to use the diffuser again on the same day with the same oil/blend or with another blend meant to offer the same therapeutic benefits, this is what you need to do:
- Switch off the power to the diffuser and unplug from the socket.
- Take it to the sink and simply pour out the remaining water from the reservoir.
- Remember to pour the water out from the side opposite to that of the air outlet.
- Place the diffuser back in its place, with the lid open, which will allow for air drying, till the next use.
Quick clean
If you intend to use different types of blends or have used heavy oils, it would be best to deal with the oily residue everyday than to allow the grime to build up. You will need to:
- Switch off the machine, unplug and pour the water out as above.
- Place the diffuser on a flat surface and use a clean dry cloth or paper towels to wipe the inside of the reservoir and the inner cover (sits on top of the reservoir and inside/below the outer ceramic/plastic/glass cover).
- Take a peek inside and if you see oil stains on the ceramic disc, use a Q-tip to wipe them off.
- If the blend used has dark colored oils in it, you won’t have a problem spotting the stains gracing the insides of the reservoir.
- Although a dry wipe down should usually be enough, depending on the quantity and the viscosity of the oil used, you may need to employ a Q-tip dipped in hot water (not boiling just very hot) to tackle the residual oily blotches. Wipe the surface dry after the hot water treatment.
Day end or alternate day cleaning
The more you use the diffuser, the greater will the accumulation of residual compounds and the sooner you get around to cleaning these, the easier it will be to tackle them. So, this is how you handle a diffuser which has seen a fair amount of oil-time over a period of 24-48 hours:
- Always switch off the power and unplug the device when not in use. Assuming that you have it switched off, take it over to the sink and discard the water.
- Some models have a spout specifically meant for pouring out the water, which is quite convenient. If your diffuser does not have such a design feature, do remember to tip the reservoir in the opposite direction to that of the air outlet and do not let the drops trickle down to the buttons which can be on the same side as the outlet or on the opposite side.
- Wipe with a clean dry cloth or some paper towels.
- Even if that diffuser has only been used for an hour tops, chances are that 4 rounds of aromatherapy will leave it with at least a thin coating of oily gunk, and you will need more than dry wiping to get rid of the sticky stuff and the dust/critters that it may have harbored. So, soak a paper towel regular in isopropyl alcohol straight from the bottle and wipe the sides of the reservoir with it. In a few seconds, the alcohol will be gone, leaving you with a sparkling clean reservoir.
- Lightly wipe the outer body/cover of the diffuser with a dry cloth or paper towel.
The monthly cleaning session
This is a slightly long drawn out process and will take about 20-30 minutes of your time, depending on how diligent you have been about cleaning the device every day/alternate day. In any case, you will be cleaning more than just the reservoir this time. This is what you need to do after switching off and unplugging the device.
Step 1: Remove the outer lid (if you have a 3 piece diffuser with a base, inside cover/lid that sits on top of the base and the outside lid which is more for aesthetics than anything else) and clean it from the outside and the inside using a clean dry cloth.
Step 2: If you can see visible stains on the outer cover or it feels sticky to touch, these will have to be tackled with some mild soap and warm water. Often the outer cover is the decorative element of the device. So, it will be colored or will have a combination of transparent and opaque surfaces. Hence, I would not recommend using alcohol on it, lest the color/material reacts poorly to it.
Step 3: The inside cover which sits right on top of the reservoir/base is usually all plastic and opaque. Use a mild dish washing soap on it and hold it under running warm water.
Step 4: If the inside lid is badly stained, add some white vinegar to your dishwashing/natural soap and give the lid a light scrubbing with a non-scratch scrub/sponge.
Step 5: Step 2: Discard the water in the device if any.
Step 6: The base of the device houses all the electrical components, so you can’t just dunk it into the dish washer or wash it under running water. Start on the outside by wiping the base with a clean dry cloth. For gunky spots, use a 1:1 solution of water and white vinegar.
Since, the base is the visible part of the device, you don’t want to damage the outside surface. Be particularly careful when wiping around the buttons and indicator lights. I highly recommend that you use a Q-tip soaked in the cleaning mixture for these areas, but make sure that the cotton bud is not dripping wet.
Step 7: This step depends on just how gunky the reservoir is. If you have been using dark colored and viscous oils like patchouli, spikenard, vetiver, etc. or citrus oils or even blends like the very popular Thieves and have not been very diligent about cleaning the device after each use, don’t be shocked to see the insides coated in tarry grime that is a mixture of the minerals in hard water as well as the residue of the essential oils. If there is a change in color, you will need some heavy duty cleaning.
For this, you need a mixture of water and white vinegar or alcohol (3:1). Fill the reservoir with the mixture till the required level and run the device outdoors for 10-15 minutes. If you cannot run it outdoors, use a mixture of water and 1-2 tsp lemon juice.
Step 8: If running the device with the cleaning mixture in it does not immediately help to get rid of the deposits, let the diffuser stand with the liquid in it for 2-3 hours. Discard the cleaning liquid. You may have to use a soft brush or cleaning sponge on the inside to remove tough stains and mineral deposits. Since you can’t rinse the base after the scrubbing, simply wipe the inner surface with a cloth soaked in water.
Step 9: Most manufacturers tell you not to go near the ceramic vibrating plate of the device. This is the tiny indentation or hole at the very center of the base. Often, this will be the dirtiest part of the reservoir. But, you are dealing with a tiny and fragile component here. So, don’t wipe it. Once again, use a Q-tip soaked in 100% vinegar or alcohol to clean the disc and the rim around it. Also, deal with all other dirty crevices in the reservoir at this point.
Step 10: Use a dry Q-tip to clean the air outlet. Because the water-oil mixture never gets to this part of the device, you won’t have any gunk in there. But, some dust is likely, which can easily be wiped off.
Step 11: Make sure the inner lid is completely dry before placing it back on the base. You don’t want droplets of water from the cover to trickle into the air outlet.
How To Clean Other Types Of Diffusers?
A wick diffuser
Most portable/mini/USB diffusers are simply ultrasonic devices with a wick. If you own one of these, here is a look at how you can clean the unit.
- The reservoir at the base is usually just a small bottle/tank made of plastic. Remove it and clean with mild dishwasher soap and rinse under running water.
- If the air intake is in the base, allow the reservoir to dry out completely before using the diffuser again.
- The electronic components will be in the lid and because these devices are small, you will have to use a Q-tip soaked in rubbing alcohol to clean the lid.
- Wipe the outer body of the unit with a clean dry cloth or a paper towel.
- Fill with distilled water and run one full cycle to remove the residual oil from the wick.
Usually, the wick has to be changed for each new oil or blend or after a certain number of uses. If the blend does not smell right, it’s time for a wick-change. Simply remove the casing that holds the wick and pull out the wick and discard. Replace with a new wick.
An essential oil burner
These are simply lamps that use a tea light candle to heat the oil and water mixture in the dish that rests on top. To clean:
- Allow the lamp to cool before attempting to clean it.
- Remove the dish/ceramic or glass components and wash with dishwashing soap and hot water.
- Clean the carbon build-up from inside the hollow that houses the candle. This will call for a bit of scrubbing with some soap and a brush.
- Wash under running hot water and dry the ceramic parts using paper towels.
A nebulizing diffuser
These are usually two or three piece devices that include 1 or 2 glass components that sit on top of the base that houses the electrical parts and the fan. To clean these units:
- Remove the glass components and place (one at a time) in a large salad bowl filled with a mixture of hot water and a mild detergent.
- Soak the glass reservoir in the soapy liquid for 30 minutes.
- Wash with regular tap water.
- Place on a towel in a safe and airy place to dry.
- Wipe the wooden/plastic base with a clean dry cloth.
- Once the reservoir is dry, put it back on the base.
If the diffuser has visible signs of gunk, simply pour some rubbing alcohol in the reservoir and run the unit for 5 minutes. Discard any alcohol that is left behind and allow the reservoir to dry.
If the tiny tubes at the center of the reservoir are clogged, use a plastic pipette dropper to squirt isopropyl alcohol directly on and in the tubes. Usually, 3-4 squirts of alcohol followed by a round of soaking in hot, soapy water will be enough to handle even the most stubborn clogs and stains.
Troubleshooting Your Diffuser
1. No power
- Unplug the device and plug it back into the electrical socket.
- Remove the pin that goes into the power socket of the diffuser and reconnect it.
- Check if you are using the power adapter meant for the device. You will be surprised at how easy it is to confuse one adapter for another.
- Look for cracks in the wire. This one is particularly important if you have pets with a penchant for chewing on things.
- Remove the lid that covers the reservoir and look for runaway droplets of water in the air outlet. If you find moisture in there, try to get to it with a Q-tip or simply leave the diffuser open for a day to allow the water to evaporate.
If none of these steps work, plug the diffuser in another socket before considering a new purchase. A diffuser can stop working for a variety of reasons but if it goes dead on you suddenly, electrical failure is likely the cause.
Often, if you are not careful when pouring water into the reservoir, some of it gets into the air outlet and from there it reaches the electrical components in the base. Over time, direct exposure to even small amounts of water and essential oil will corrode the circuit board and the fan and kill the device. If this is the problem, you will have to buy a new diffuser.
2. No diffusion or not enough diffusion
- Check the water level in the diffuser. At least with new units, it’s usually a lower than required water level that interferes with vapor formation.
- If you have the right level of water, check the mist setting on the machine to ensure that the knob has been turned to the highest setting.
- For machines that have been in use, the fan may be a likely problem. Although this is the weakest and most over worked component of the diffuser, usually it’s clogging and not a mechanical malfunction that is the problem. If the fan is posing an issue, you will see vapor inside the diffuser but it won’t get out of the nozzle/outlet of the outer cover.
- If this is the case, switch off the device, unplug it and discard the water as instructed above. Wipe the insides of the reservoir and then turn the machine over.
- Make sure that the air inlet vents are not clogged by dust or oil residue.
- Use a Q-tip dipped in rubbing alcohol to remove any gunky deposits that may be hampering the inflow of air.
- Use compressed air or your hair dryer set at its lowest setting to get rid of the dust on the fan blades. If using your hair dryer, hold it 3-4 inches away from the vents. The fan that you are dealing with is quite small and fragile.
- Place the unit upright and try to use it as you would normally.
If it still does not work and it’s an inexpensive diffuser, it would be best to buy yourself a new device. The alternative is to buy a fan replacement kit. You may not find the replacement parts for all diffusers but most well-known manufacturers do offers these repair kits for a few dollars.
3. Water overheats
The fan of the diffuser not only disperses the vapors formed by the ultrasonic disc but also helps to keep the LED lights and the other electronic elements cool. So, if the water is too hot, chances are that the fan is either not working properly or it is overloaded. This is what you need to do:
- Switch off the unit and unplug it.
- Check the level of water in the unit. Overfilling the diffusers will exert undue pressure on the fan and the electronic components and will lead to their malfunction over time.
- If the level of water is above the required mark, pour out the excess and allow the machine to cool down for 30 minutes before operating it again.
- If the level of water is as required, remove the water and check for fan troubles as instructed above.
- If there is nothing blocking the air inlets or if you are done cleaning the vents, let the machine cool for 30- 60 minutes.
- Refill and try to operate it again. If the water overheats again, you likely have a problem with the electrical components.
4. Diffuser does not start
There are two ways in which this can happen. You flick the switch on and there is no action from the diffuser. This means there is no power supply to the device. Go through the steps in the “no power” section above.
If the light flickers and then shuts down or the unit simply does not come on, chances are that you have an issue with the vibrating disc. The ceramic ultrasonic disc has a lifespan of about 4k-5k hours and when it conks out, your diffuser will act as it would when there isn’t enough water in the unit.
Unless you have been using your device a lot, there is a very good possibility that the disc malfunction is not related to the end of its working life but to the accumulation of grime.
- Use a Q-tip soaked in rubbing alcohol to clean the disc. If it still seems gunky, pour a 1:3 mixture of white vinegar and water and run the diffuser outdoors for 15 minutes or let the cleaning mixture stand in the reservoir for 2-3 hours. Then, discard the fluid and scrub the disc gently using a Q-tip soaked in alcohol.
- Remember that this is a ceramic disc, which means that if you exert too much pressure when cleaning, it will crack. So, stick to a Q-tip and don’t press down too hard.
- Wipe the inside of the reservoir or allow it to air dry before trying to use the unit again.
You can get disc replacement kits as well if you want to hang on to the diffuser for a bit longer. These cost in the range of $15 to $25 and are quite easy to use.
10 Tips To Keep Your Diffuser Working In Top Condition
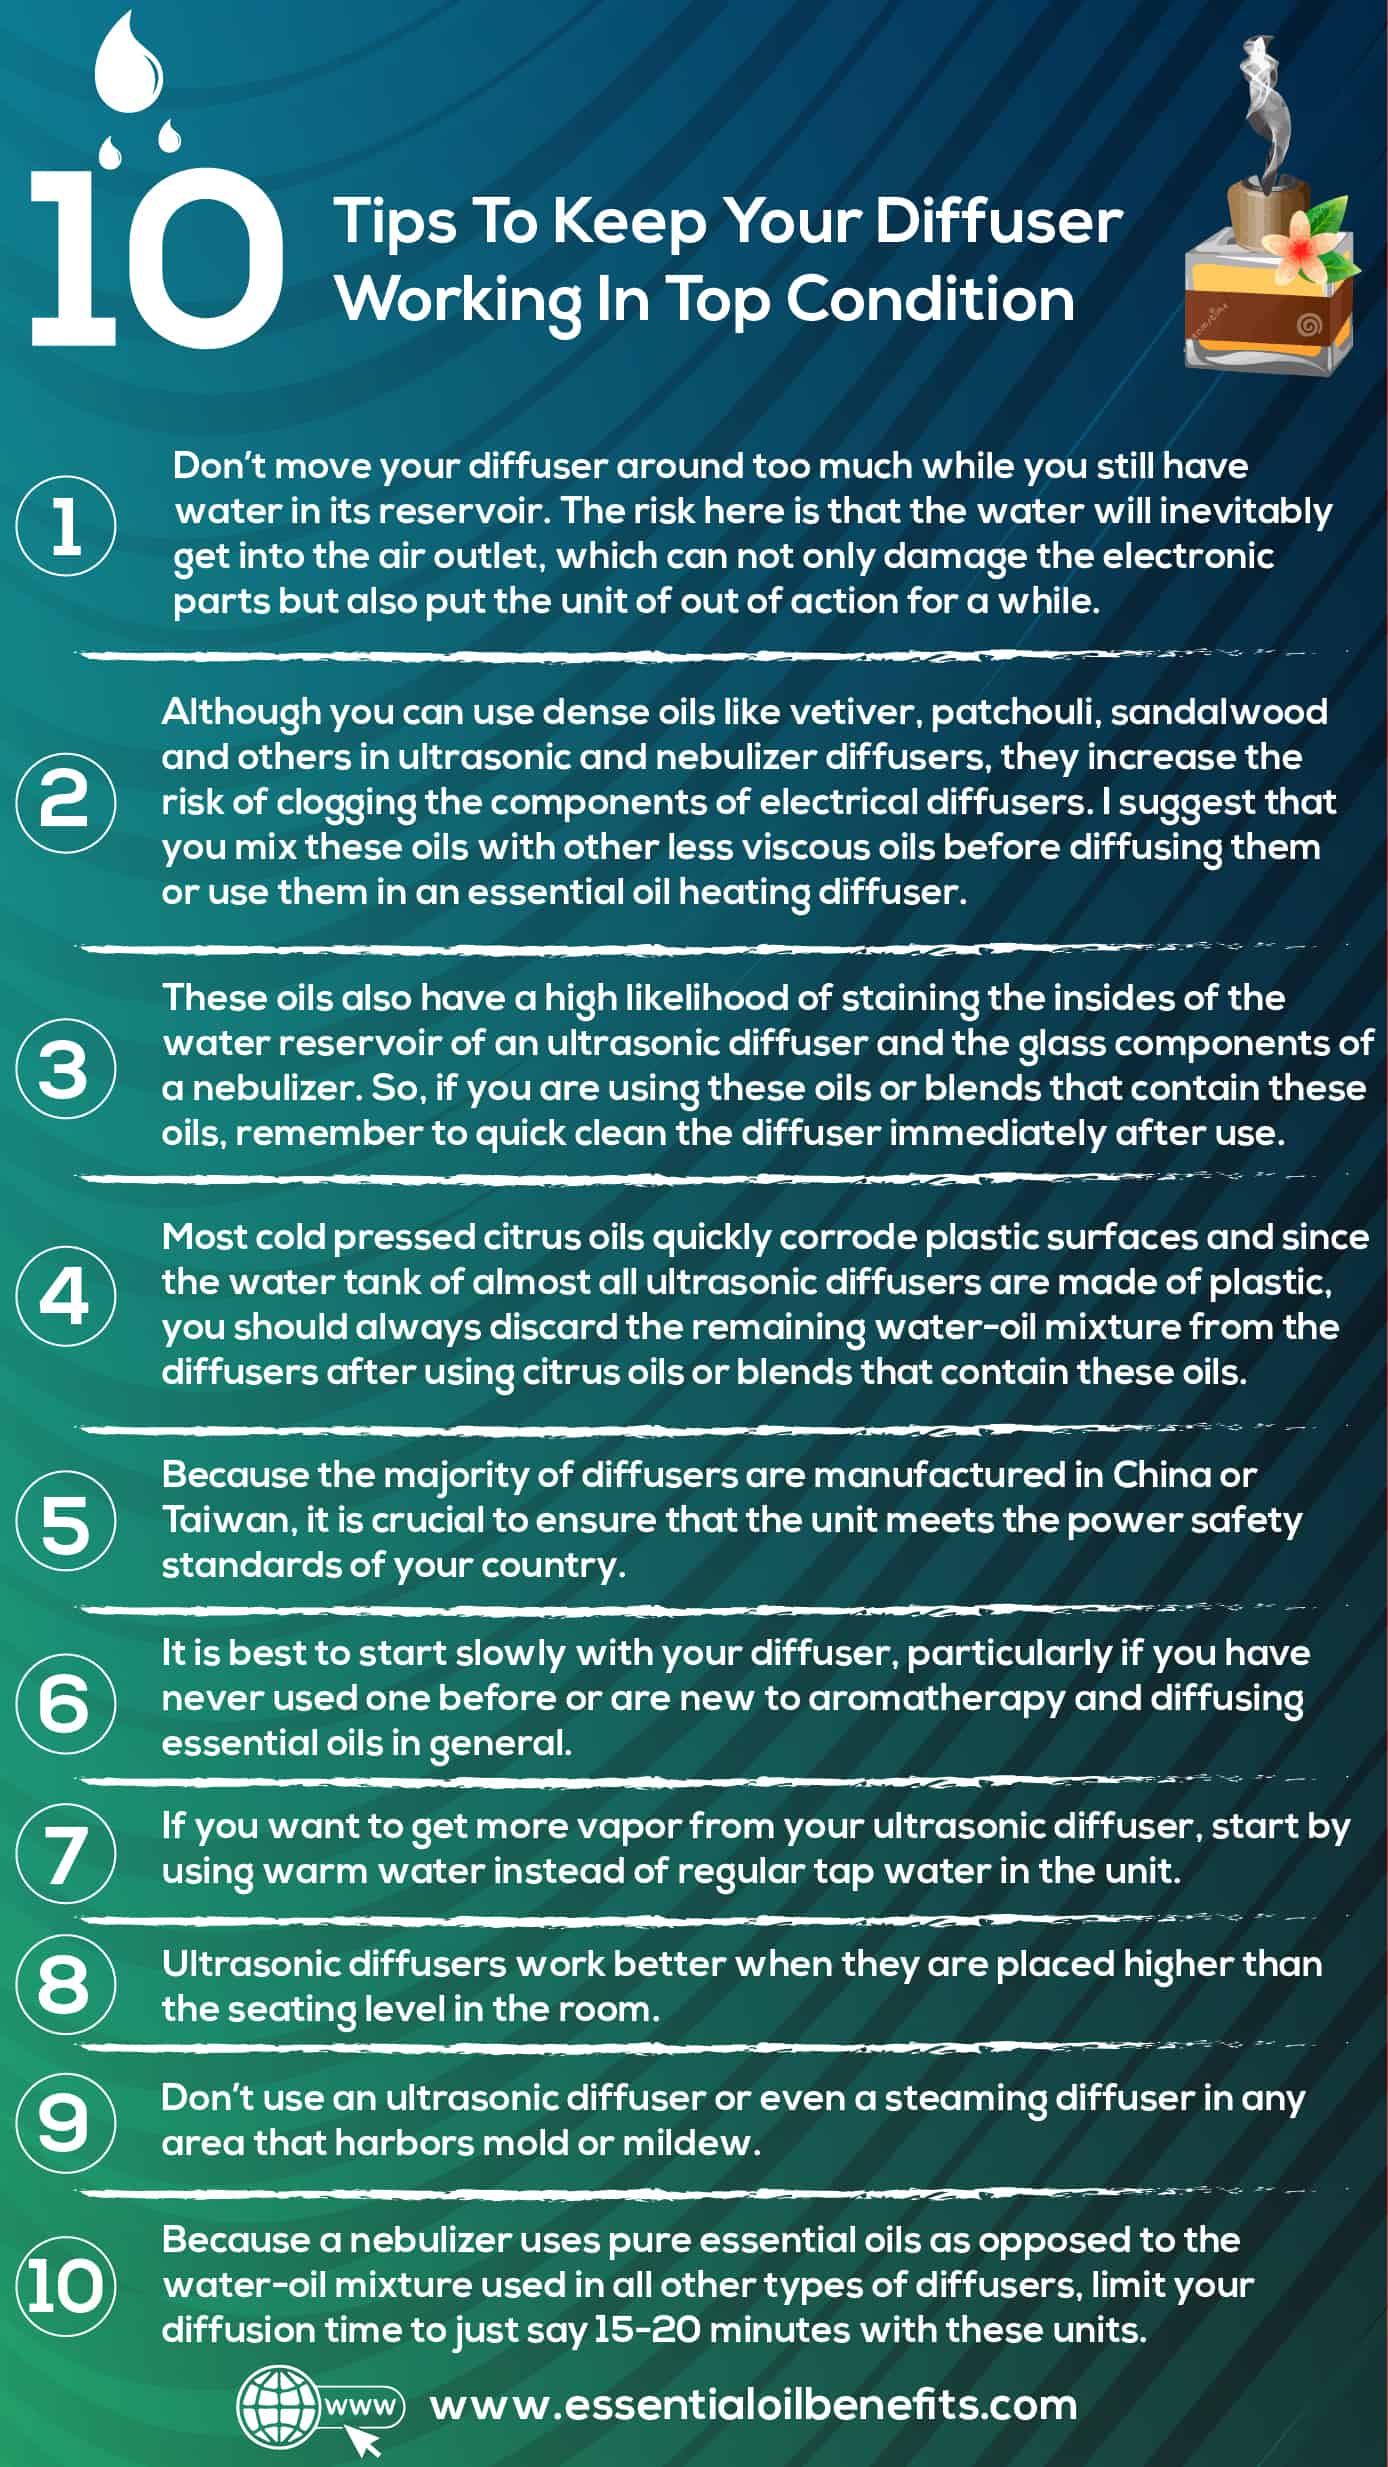
- Never move your diffuser around too much while you still have water in its reservoir. The risk here is that the water will inevitably get into the air outlet, which can not only damage the electronic parts but also put the unit of out of action for a while. The right way is to always empty the water tank, wipe it and then you can move or store the unit as required.
- Although you can use dense oils like vetiver, patchouli, peru balsam, sandalwood and others in ultrasonic and nebulizer diffusers, they do significantly increase the risk of clogging the components of electrical diffusers. I suggest that you mix these oils with other less viscous oils before diffusing them or use them in an essential oil heating diffuser (candle light).
- These oils also have a high likelihood of staining the insides of the water reservoir of an ultrasonic diffuser and the glass components of a nebulizer. So, if you are using these oils or blends that contain these oils, remember to quick clean the diffuser immediately after use.
- Most cold pressed citrus oils quickly corrode plastic surfaces and since the water tank of almost all ultrasonic diffusers are made of plastic, you should always discard the remaining water-oil mixture from the diffusers after using citrus oils or blends that contain these oils. That said, cold pressed citrus oils don’t do well when exposed to heat, so an essential oil heating diffuser would not be a good choice for these.
- Because the majority of diffusers are manufactured in China or Taiwan, it is crucial to ensure that the unit meets the power safety standards of your country.
- It is best to start slowly with your diffuser, particularly if you have never used one before or are new to aromatherapy and diffusing essential oils in general. Go for no more than 3-4 drops of a single or a blend and only diffuse for 10-15 minutes at a time. In fact, limit your diffuser sessions to just 1 per day in the beginning, and then if need be, work your way to 2 or even 3 sessions per day.
- If you want to get more vapor from your ultrasonic diffuser, start by using warm water instead of regular tap water in the unit. Manufacturers have different recommendations for the water to be used in their ultrasonic diffusers. Personally, I like to use distilled water for diffusion. It is safer, and it lowers the risk of grime accumulation on the inside of the reservoir.
- Ultrasonic diffusers work better when they are placed higher than the seating level in the room. This way, the micro-droplets of the water-oil mixture, which are heavier than the air molecules, fall down and easily enter your breathing space. Plus, the antimicrobial oils coat the upholstery and the furniture, so you get more from their disinfectant action.
- Don’t use an ultrasonic diffuser or even a steaming diffuser in any area that harbors mold or mildew. Because these methods of diffusion use steam/water vapor, you will simply add to the dampness by using them and encourage the fungus to thrive.
- Because a nebulizer uses pure essential oils as opposed to the water-oil mixture used in all other types of diffusers, limit your diffusion time to just say 15-20 minutes with these units.

